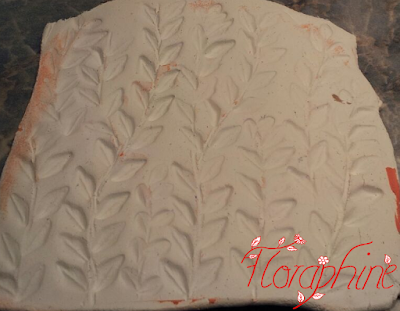
Today I want to show you my version of a texture sheet for texturing polymer clay.
 First I made a leave stamp. For that I took a bit of clay (I used air-dry clay but you can also use polymer clay).
Then I rolled it into a small log.
I shaped it into a leave by pinching the sides into points.
The leave only needs to be at the end of the stamp, the other part I rolled into a handle. To flatten the stamp I pressed it onto my working surface and pinched it again to correct the leave shape.
Then I cut into the leave to have a vein. You can also make more veins but I wanted to keep it simple. Press it onto your work surface again to make it even and then let dry or bake.
For the texture sheet I rolled out a sheet of scrap clay. It also works with air-dry clay.
Don't make it too thin.
Finally, I made some lines with my dotting tool, they don't have to be straight. I then stamped with my leave stamp at both sides of the lines to create my leave pattern.
Remember to not make it too shallow, otherwise it won't stamp well. So press in the stamp pretty deep. Mine on the picture for example is too shallow... So I made another one (see below).
Then bake according to the instructions on your clay package.
Now you can use your texture sheet just like that but you'll need to put on some release or it will stick to your project. You can use water (not if you have used air-dry clay) or something like flour or baby powder.
 |
| Leave Texture Sheet |
I suppose you could also use hot glue which you spread over the sheet and peel off afterwards but I haven't tried that, yet.
Here my finished silicone mould. It didn't come out perfectly and has some flaws but I don't mind. They are hardly noticable once you have applied it to your project.
 |
| Leave Texture Sheet |
That's it for today. I hope it was useful for you. Let me know if you like it in the comments and if you have any suggestions what I could have improved or made differently :)
See you soon


it is just awesome! <3
ReplyDelete