
Hello ;)
Today I want to show you how you can make a very simple leaf necklace that is perfect for summer and looks really pretty.
I got the inspiration from a dress I have that has really nice flowers and leaves.
Today I want to show you how you can make a very simple leaf necklace that is perfect for summer and looks really pretty.
I got the inspiration from a dress I have that has really nice flowers and leaves.
Materials:
Polymer clay
Blade or xcto knife
Roller
Needle tool or toothpick
Acrylic paint
(Beads)
Jewellery findings
Round-nose pliers
Blade or xcto knife
Roller
Needle tool or toothpick
Acrylic paint
(Beads)
Jewellery findings
Round-nose pliers
Instructions:
Roll out clay in the colour you want your leaf to be. I mixed a dark green to go with my dress but of course you can make it any shade you like. Don't make the clay sheet too thin. Trace a leaf on there with a needle tool or toothpick.
 |
| Tutorial Simple Leaf Necklace |
Then cut out your leaf shape. You can definitely use a cookie cutter for this but simply cutting it by hand works fine. If you have a bendable blade, use that.
 |
| Tutorial Simple Leaf Necklace |
 |
| Tutorial Simple Leaf Necklace |
Make sure you round off the edges really well with your fingers to give it a natural look.
 |
| Tutorial Simple Leaf Necklace |
Now onto the veins. Use a needle tool or toothpick to make indents in the clay for the veins. You can trace them first if you're unsure. Then deepen them slowly to get them accurate. You can make them as detailed as you like, I stuck to a very simple design to match my dress.
 |
| Tutorial Simple Leaf Necklace |
Smooth out any lines you don't want there with your fingers. If you have difficulties removing them, use a little bit of liquid clay or even water on your finger.
Now just make some holes in each end of the leaf to hang it later. You can also drill the holes after baking if you like the look of more accurate holes. This way you don't risk distorting your design, too. However, if you don't have a hand drill, make the holes prior to baking.
Then bake your leaf according to the instructions on your clay package.
Then bake your leaf according to the instructions on your clay package.
 |
| Tutorial Simple Leaf Necklace |
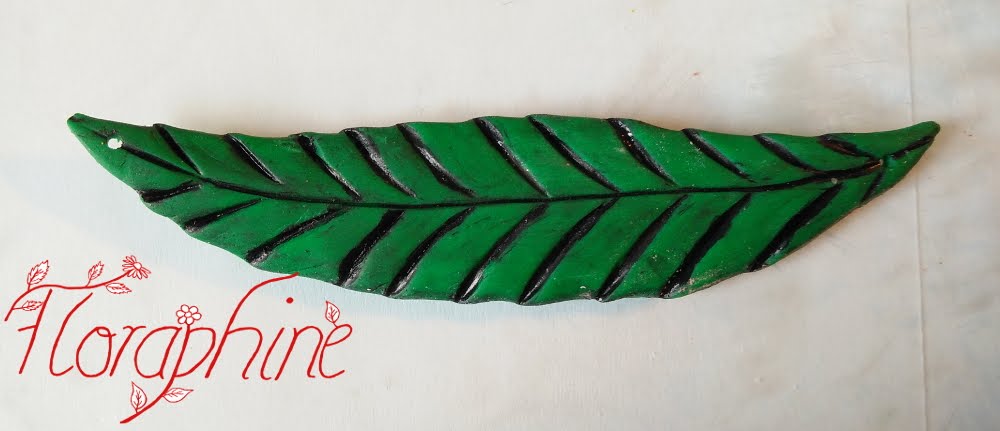
After baking we can add some paint into the crevasses to make it more interesting. I chose black paint but you can use any colour you like. You can experiment until you like the look.
Thin out your paint with water and brush it on the leaf, making sure you cover all the little deep spots you have created. Let the paint dry a bit and then rub off the excess from the high parts with a baby wipe or a q-tip with alcohol. If you rub off too much, you can always fix this with more paint. Then varnish the leaf to protect the paint and that's it.
Thin out your paint with water and brush it on the leaf, making sure you cover all the little deep spots you have created. Let the paint dry a bit and then rub off the excess from the high parts with a baby wipe or a q-tip with alcohol. If you rub off too much, you can always fix this with more paint. Then varnish the leaf to protect the paint and that's it.
 |
| Tutorial Simple Leaf Necklace |
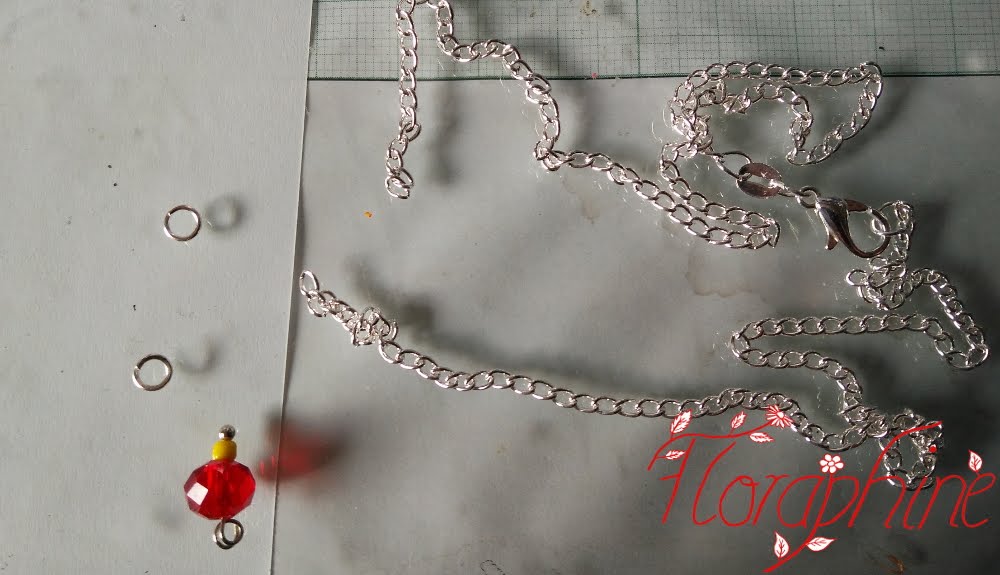
To make it more interesting, you can add some beads. For this you'll need a head pin. Put the beads in the colour and size of your choice on your head pin and bend a loop at its end with round nose pliers. You might need to cut the excess wire. If you do need to cut anything, I recommend filing away any sharp edges with a nail file so you don't poke yourself when wearing the piece.
 |
| Tutorial Simple Leaf Necklace |
Now you just need to assemble it.
Attach a jump ring on either side of the leaf by carefully twisting the open ends of the jump ring with pliers. Never pull open any loops of metal, always twist!
 |
| Tutorial Simple Leaf Necklace |
Measure how long you want your chain around your neck and then open up the little rings in the right place. Attach the chain to your jump rings and add a lobster clasp and a jump ring as closure if necessary. To add your head pin, put it on the jump ring with its loop and twist it shut.
 |
| Tutorial Simple Leaf Necklace |
And it's done!
 |
| Tutorial Simple Leaf Necklace |
Easy but very pretty :)
 |
| Tutorial Simple Leaf Necklace |
I hope you liked this easy tutorial. Let me know what you think and if you have any questions.
See you soon

No comments:
Post a Comment