
This winter and Christmas time I wanted to share some of my creations with you. Most of them are as usual made from clay - Fimo, as well as air-dry clay - and most of them are also really simple to make. Many times I was inspired by amazing crafts on Pinterest and I'll provide the links to the original creations, so it's easy to recreate them.
Firstly the things I created in 2014.
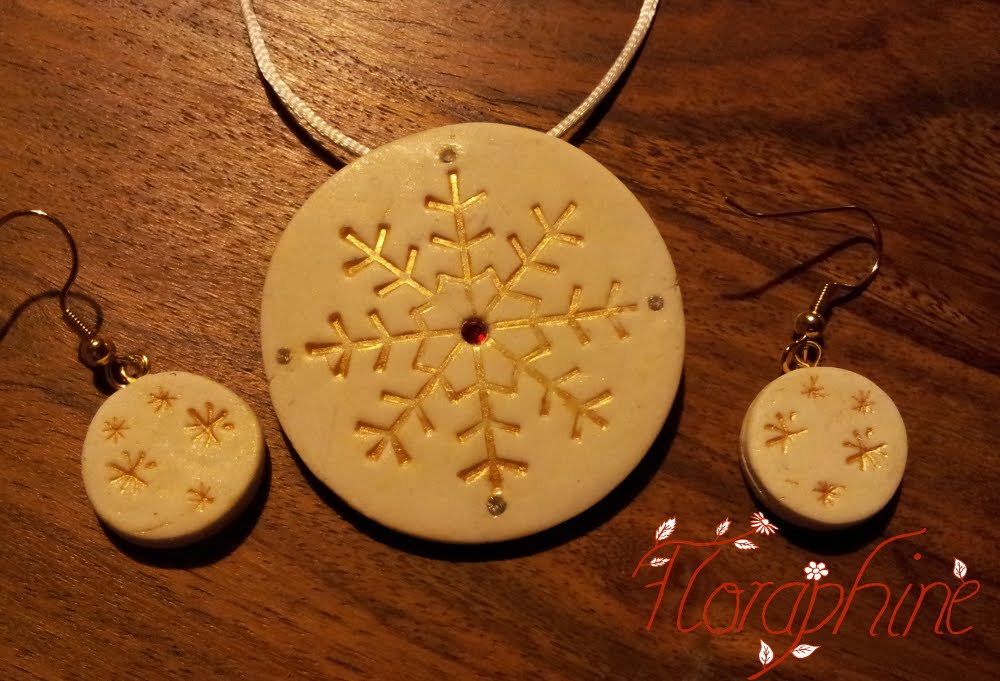
Here I made delicate snowflake jewellery. I struggled a bit with the snowflakes but in the end they turned out quite nicely. The red part is stamped onto and then I carefully smeared some silver cream eye shadow on top (this is a great alternative to pearl-ex powders :) I also put some red swarovski in there.
 | |||||
| Christmas Snowflake Jewellery |
It wasn't easy to craft something this tiny but I'm pleased with the outcome :)
 |
| Crib in a Walnut |
To make it more wood-like I also added some texture with some tools. For that you just need to make some lines in the clay.
Afterwards I dry-brushed (this means you wipe your brush, so there is hardly any paint left) with white to highlight the raised areas and glazed the whole thing.
They turned out quite nice but as I didn't manage to get them completely straight, they don't stand so well on their own. However, a bit of cotton helps :)
Here there are with the one on the left being a real wooden one:
 |
| Faux Wood Trees |
After it was hardened I painted them with sand-coloured paint and a bit of darker brown at the edges. I then painted on the patterns.
This is a perfect craft to make with kids and I actually made them together with a child myself :)
Here they are:
 |
| Christmas Cookie Ornaments |
What I also made last year was this cute little gingerbread house out of Fimo clay. You can find a lot of tutorials on YouTube if you need inspiration. I found that baking the walls first and then adding them together easiest for me (so like a real gingerbread house). I then added everything together with watered down white clay as the frosting/snow but I would recommend mixing it with Fimo Liquid or Translucent Liquid Sculpey instead of water, it's easier. I then made some simple decorations and added them to the house.
Here it is:
 |
| Gingerbread House from Fimo |
I also made some miniature trees on a bark. The snow is also watered down white clay and after baking I glued on some fake snow. The flakes were a bit too large though :D
 |
| Trees on a Bark |
I had to recreate it:
 | |
| Christmas Cup |
Now some of this year's treasures.
The first craft I got inspired by this post by Mandi Johnson on simple but very pretty lighted trees from air-dry clay. There is a very good explanation and even templates on her website.
Instead of star cutters I used a round one. I have to say that my LED tea lights were a bit large for the small trees but the 'snow' covers the excess ;)
Here my recreation:
 |
| Tree Lights |
I also fell in love with those snowflake ornaments from air-dry clay by faltmanufaktur who gives also some really good explanations and photos.
I couldn't find any good snowflake cookie cutters in the store, so I bought two on ebay.
Here are they displayed in my living room:
 | |
| Snowflake Ornaments |
What I also find really pretty are those rustic snowflake ornaments by little things bring smiles. Here you can also find some really detailed and easy-to-follow instructions.
This is one of mine:
 |
| Rustic Snowflake Ornament |
Finally, I created some faux wood stars that are really easy to make. My mum inspired me to do these because she was looking for some small stars for her centrepiece. I said 'I can make something like this.'
So I rolled out some air-dry clay and with a very small star cutter I cut out the stars. I added some wood texture by creating lines with a toothpick and let them dry. Afterwards I gave them a wash of brown. You do this by thinning down your brown paint with a lot of water and then brushing it on there. If you have thinned it down enough you don't even have to wipe away the excess. The paint stays in the crevasses and gives the piece a very nice texture. My stars then looked like birch or something.
Here they are. I’m pretty pleased with the outcome as they were really simple to make:
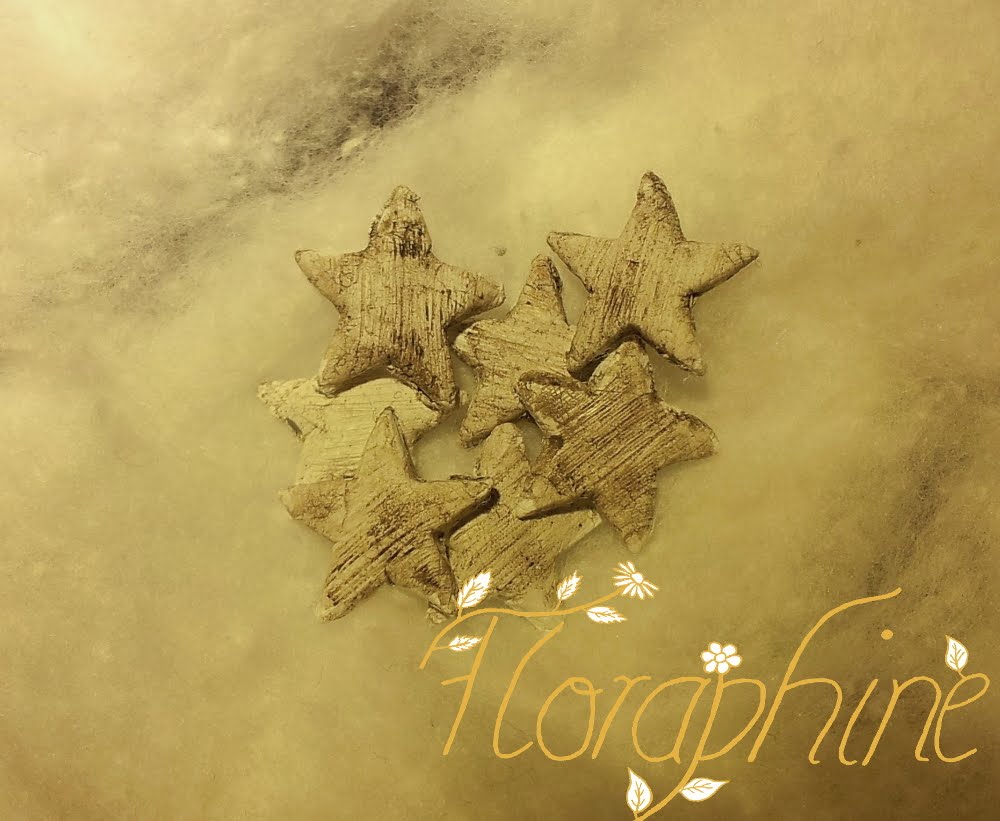 | |
| Faux Wood Stars |
I'll update this whenever I make something new Christmas-related so keep coming back :)
UPDATE:
I just finished some wintery jewellery and wanted to share it. I used black polymer clay and then made a design into it using several tools. The little stars for example were made with the tip of a very small screwdriver, the snowflakes were made with a very fine tool I created myself out of some leftover metal from a tea light (it's basically a very small blade). Then I put the hill on there and textured it with sandpaper and a needle tool, the moon and the little cat (I hope you recognize that it's a cat :D) are raised parts, too.
I also created some beads with snowflakes which I covered with my silver cream eyeshadow just like the cat, the moon and hill.
After baking I covered the main piece in white paint and then wiped it away on the raised areas. People in tutorials always make that look so easy but I find it hard to get the paint off without wiping away everything. So what I found working better for me is letting the paint dry and then with a q-tip and nail polish remover I wipe it from the raised areas.
Here it is, I hope you like it:

Today I made some etched wood art. I found a post about Etched Snowflake Ornaments by Design Mom and I had to recreate it. Instead of ornaments I made coasters and I want to give them to my mum for Christmas.
I bought these wooden pieces, drew a snowflake design on it using a pencil and then traced it carefully with an etching tool. At first my lines were a bit wonky but I got better quickly. If you're careful it's not that hard and it looks amazing :)
Here they are:
 |
| Etched Snowflake Coasters |
Here I made a star-shaped tea light holder. I rolled out some air-dry clay, cut out a star and then cut out small designs. With the help of a tea light that I want to fit in there I shaped the cup part of the tea light holder and glued both together later. After drying I painted it golden. You can put it on the table or hang it.
Here it is:
 |
| star tea light |
I used some cookie cutters for that and then pressed alphabet noodles into to make the names and carefully removed them again. Then I stamped part of a snowflake stamp into my pieces to make it prettier and made holes to hang them.
Now everybody will know whose gift it is.
 |
| gift tags |
These stars were really easy to make. I only took a bit of polymer clay (you can also use air-dry clay) and then cut out stars. If you don't have cutters this small you can of course freehand it or make a little template you put on the clay and trace around it.
You can paint the stars either after baking or if you have ot you can put golden, silver, copper (or any) powder on there before baking. Don't forget to put in a small hole (not too close to the tip of the star or it might brake later) and you're done.
I put headpins through the holes and bent themto eye lets but you can also use a large jump ring.
 | |
| star earrings |
A couple of crsytals make it extra shiny :)
After baking I used golden paint to highlight the low parts. To do this I first covered the whole piece in paint again, let it dry and then removed the paint on the raised areas with nail polish remover and a q-tip. That's it :)
 |
| golden snowflakes |
I'm pretty pleased with the last piece, too :D
For this technique you need polymer clay with shiny particles like gold, silver, pearl etc. Firstly, you need to condition it really well to help the particles spread evenly. Then Ir rolled it out, pressed a texture sheet in there (mine is from Staedtler) and with a bendable blade I carefully shaved away the raised parts so that it became smooth. Because of the shiny particles the pattern stays intact. You call that mica shift. There's a tutorial for example by Mymandarinducky.
Here my creation, it was my first try :)
 |
| golden Mica shift |
That's it for now.
See you

No comments:
Post a Comment